3i SDC - Slidebook Basics
The 3i SDC is controlled via SlideBook 6.

The Getting Started manual from 3i can be found here.
To locate your cells, first choose your objective, and appropriate stage adapter for your sample. Once your sample is appropriately placed on the stage, you can move to the software.
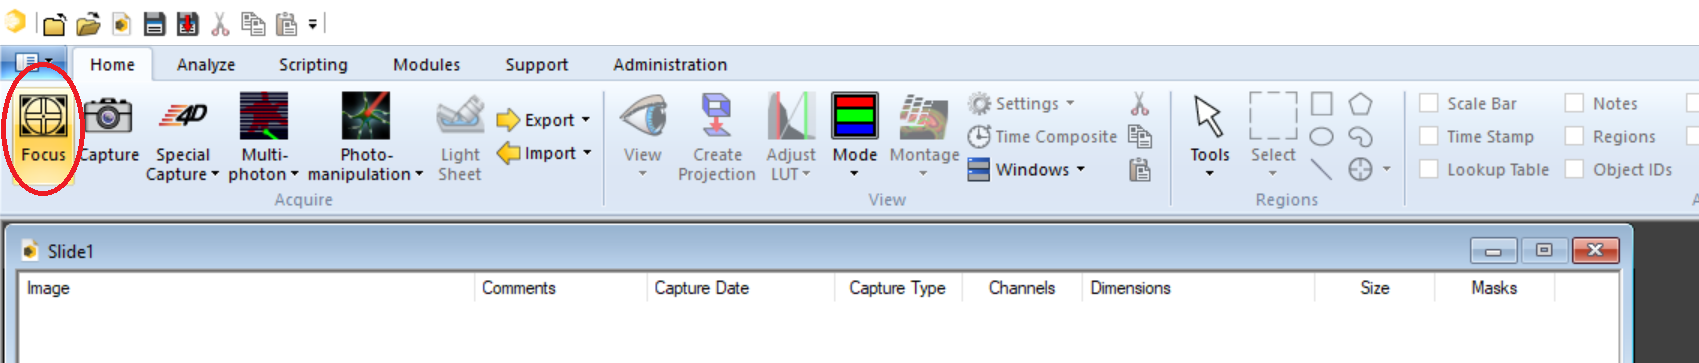
The most important controls are the Focus and Capture buttons in the top left of the Home tab. Click the Focus button to open the Focus window, where you can set the acquisition parameters for the live preview image.
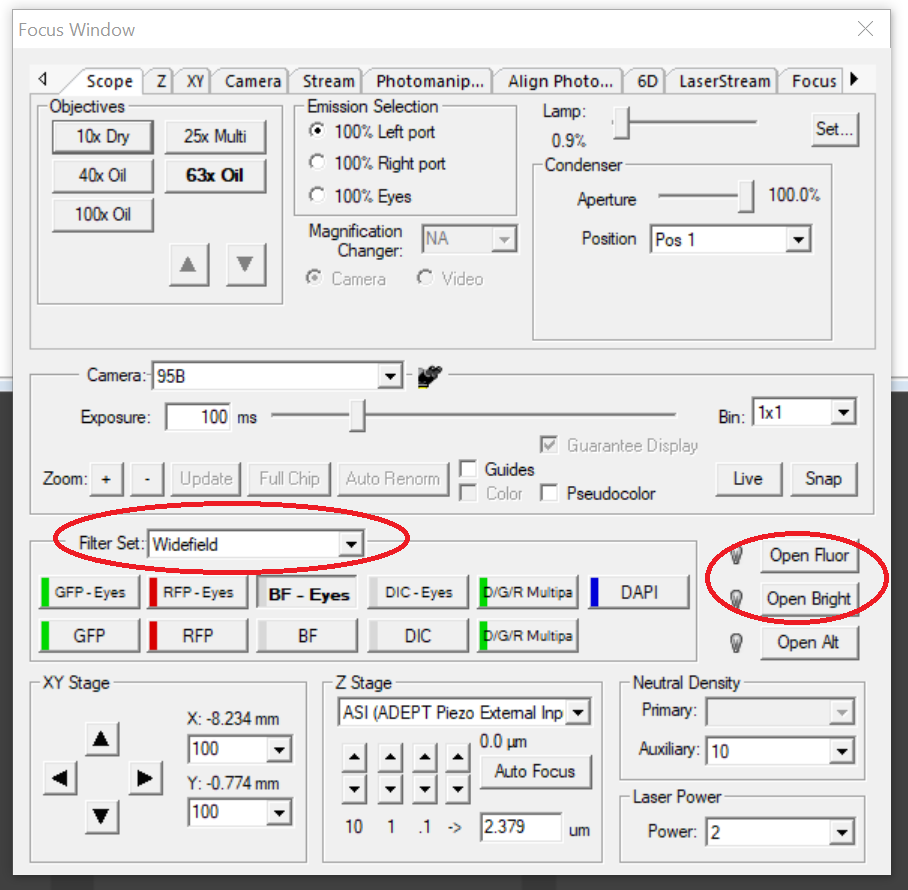
In the Focus window, under Camera, select "eyepiece" and under Filter Set, select "Widefield". Amongst the available filter sets you will see ones called ‘GFP Eyes’, ‘RFP Eyes’ etc. These are for viewing your specimen down the eyepieces. "Open Fluor" opens the shutter for the fluorescent light source, and "Open Brightfield" opens the shutter for the transmitted light source. "Open Alt" opens the laser shutter and isn't relevant for looking down the eyepiece.
Filter Sets in SlideBook
In the SlideBook nomenclature the ‘Filters’ don’t just move the correct filter into position, but also can change the light path (e.g. to camera or to eyes) and can open the default shutter. They are analogous to Optical Configurations in Nikon NIS-Elements, Light Paths in Volocity and Configuration Presets in Micromanager.
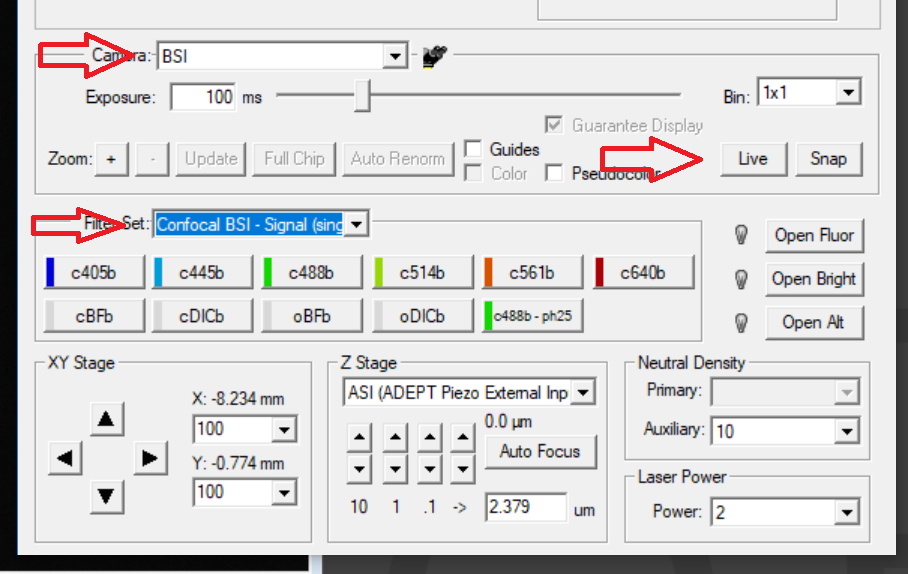
To visualise using a camera, first select a camera, then select a filter set, and then click on 'live' if the camera view isn't already showing in live. There are different sets for different uses and different cameras.
Most people would use one or the other camera and not both at once. The 95B is more sensitive than the BSI, but it has larger pixels and hence lower resolution. The "Signal" sets are single emission filters and are designed to give cleaner signals with no bleedthrough and/or crosstalk. The "Fast" sets are triple or quadruple bandpass filters which cut out the excitation wavelengths, but will let bleedthrough and/or crosstalk through to the cameras. If you are doing time-lapses where speed is important, the "Fast" filters may be better, but if you want cleaner signals and don't mind the time it takes for the emission filters to switch, the "Signal" sets may be better. Details on the filters can be found here.
The stage can be controlled via the joystick (tap the bottom on top to change the speed) or via SlideBook. The "Neutral Density" filters in the focus control box aren't actually neutral density filters, but a sort-of shutter to reduce the area of illumination of the lasers so that it is closer to the field of view of the camera and doesn't bleach outside of the area you are capturing. The focus and autofocus controls will be explained in the next wiki.