Getting Started - Putting A Specimen On And Locating It Using the Ocular
The Nikon N-STORM microscope is built around a Nikon ECLIPSE Ti-E inverted microscope stand. The microscope is fully enclosed by a blacked out Solent Scientific incubation chamber and also uses Solent Scientific stage insets which are available for e.g. standard microscope slides, LabTech chambers, as well a 35 mm and 60 mm glass-bottom dishes.
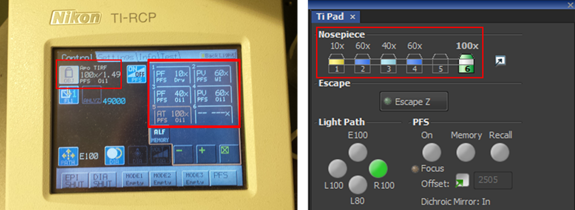
- Select the objective lens you would like to use for your experiment. This can be done either from the touch panel controller or in the NIS-Elements software.
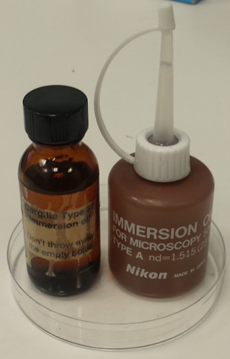
- If you have selected one of the oil lenses add a small drop of immersion oil (can be found inside the microscope chamber) onto the front of the objective lens. There are two types of immersion oil available, one standard oil for working at room temperature and a special Type 37 oil for experiments at 37 °C. When using the water immersion lens (WI) use a small droplet of water instead.
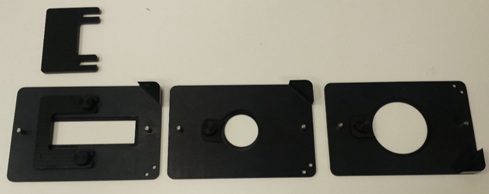
- Select the inset that is suited for your sample and mount the specimen in it.
- Lower down the objective lens a little using the focus wheel on the microscope or the stage controller (A) and holding the inset (B) on the handles place it inside the microscope stage by pushing the inset against the metal clips in the far right corner and then down until it sits firmly in position (no sample mounted in the picture below).

- Use the stage controller (A) shown in the picture above to adjust the XY-stage position with the joystick. The XY-speed can be adjusted between Coarse, Fine and Extra Fine by rotating the joystick sidewards. Use the Z-focus wheel to bring up the objective lens until the immersion oil gets in contact with the glass coverslip or after configuring the light path as described in the next step 7 to focus on the sample. The Z-focus wheel provides three different step sizes, Coarse, Fine and Extra Fine which can be selected by pressing the white button.
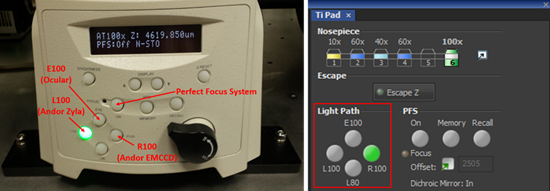
- Now configure the light path to look at your sample through the eyepiece by pressing the Eye button on the front of the microscope stand or E100 under Light Path in NIS-Elements.
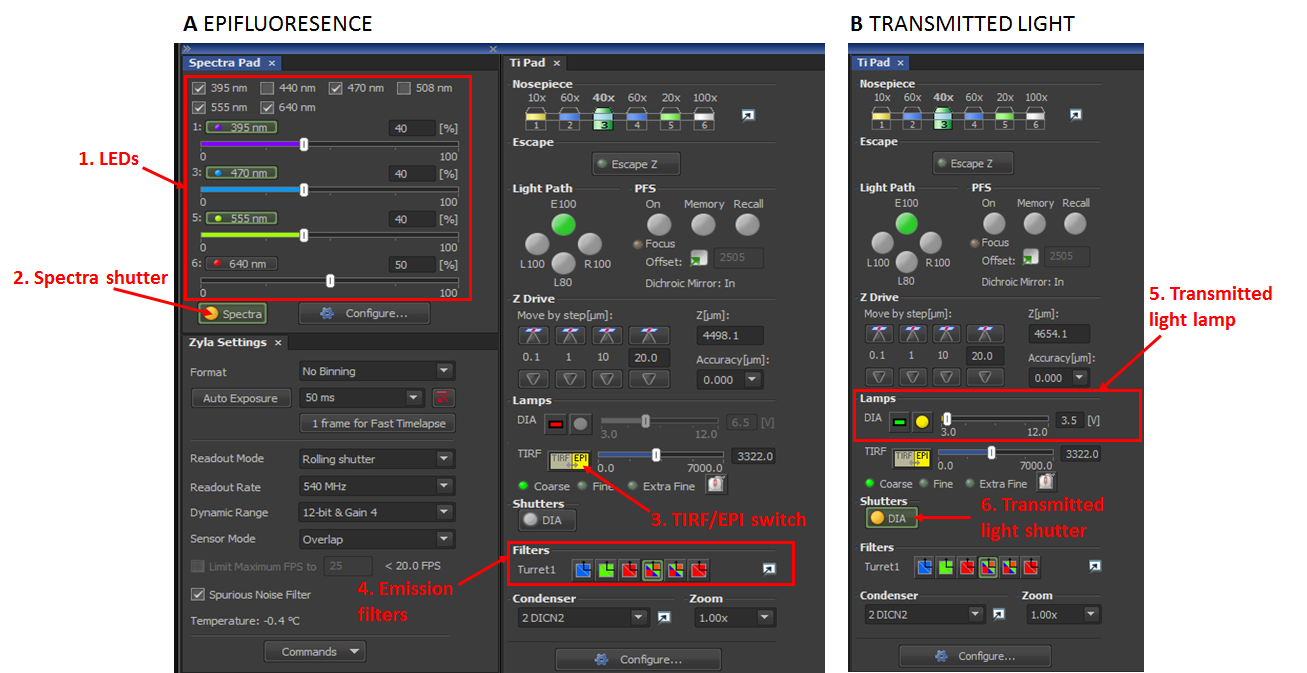
You can look at your sample in epifluorescence (A) or transmitted light (B) mode:
- Epifluorescence: Go to the SpectraPad inside the NIS-Elements software, select an LED (1) for fluorescence excitation, e.g. 470 and use the corresponding slider to adjust its intensity. Now open the Spectra shutter (2) by clicking on the Spectra button. Inside the TiPad make sure that the EPI illumination mode is selected and not TIRF by pressing the TIRF/EPI switch button (3) and under Filters (4) select the SpectraQuad filter (or the emission filter that matches your fluorophore emission). You should now be able to see the excitation light coming out of the objective lens and to focus on your sample looking down the ocular.
- Transmitted light: Close the Spectra shutter (2). In the TiPad turn on the transmitted light lamp by pressing the DIA button under Lamps (5). The transmitted light intensity can be adjusted by moving the corresponding slider. Now open the transmitted light shutter (6) by pressing the DIA button. You should see white light coming out of the condensor onto your sample, and you can now focus on your sample looking down the ocular.
Bring your sample into focus using the Z-focus wheel.
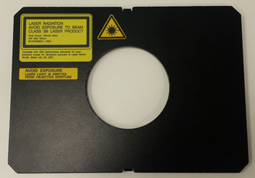
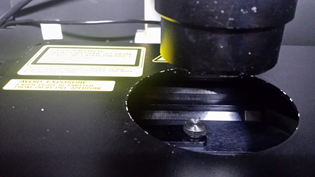
- If you are only using widefield illumination from the SpectraX LED light source you can now close all doors of the enclosure and set up your experiment in NIS-Elements as described in GETTING STARTED - Multiparameter widefield and TIRF imaging. If your experiment requires illumination from the LU-NV lasers e.g. for TIRF or STORM imaging as described in GETTING STARTED - Multiparameter widefield and TIRF imaging or GETTING STARTED - STORM imaging and analysis respectively you have to place the interlock lid on the microscope stage (see images below) as otherwise the laser will be shut off to protect you from unwanted exposure to the excitation light.