On the Olympus FV1200 certain dye combinations cannot be imaged together in sequential mode due to the available fluorescence filter combinations. A way to overcome this problem is the use of the “Virtual Channel Scan” mode.
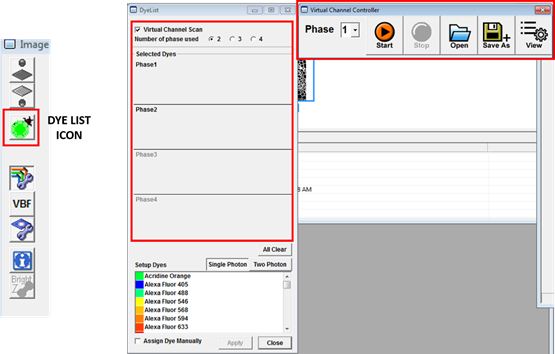
To open the Virtual Channel Scan menu click on the Dye List icon and tick the Virtual Channel Scan checkbox in the DyeList window. This will open a Selected Dyes list with different phases and the Virtual Channel Controller. The number of phases available can be changed by selecting 2, 3 or 4 next to “Number of phase used”. To set up the phases select the dyes you would like to use from the list below and drag them into the Phase in which you want to image them. Make sure that dyes that cannot be imaged together in the normal multichannel setup are put into different phases.
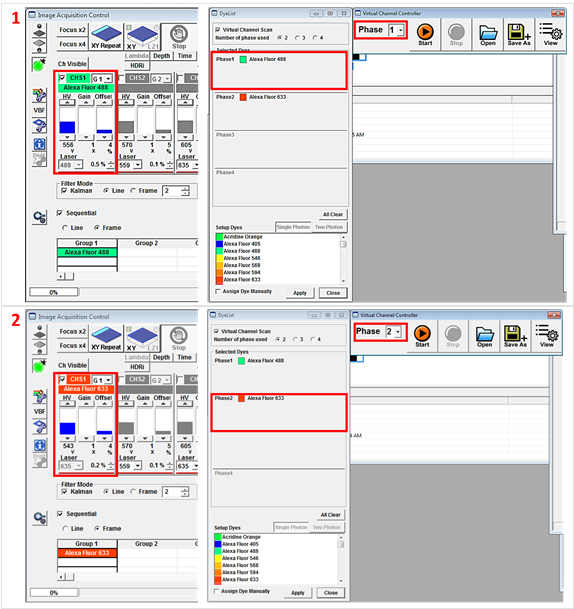
To switch between channels in different phases (e.g. Phase 1 (1) and Phase 2 (2)) and adjust their parameters select a phase from the Phase dropdown menu within the Virtual Channel controller. The channels within the phase will then be displayed in the Image Acquisition Control window.
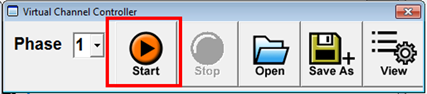
To start an image acquisition using the virtual channels scan mode press the Start icon within the Virtual Channel Controller. Whilst recording the image the Virtual channel controller will switch between the different phases. A new image window will open when the acquisition is complete. Click File -> Save as… to save the image.
Clicking the Save As-button in the Virtual Channel Controller allows you to save a file containing the Virtual Channel Scan acquisition parameters. Press Open to locate and load image acquisition parameters that were saved previously.
The Virtual Channels Scan mode is also compatible with Z-stacks and time-lapse imaging.