M01 - Moodle course structure
Keywords: course format, layout, design, topics, sections, unhide, visible, make available, student access, template
What is it?
Moodle course home pages are arranged in a three-column format, with course sections appearing in the main content column in the middle of the page, a collapsible Course Index appearing on the left of the main content section, and a collapsible block section appearing on the right of the main content section. The widest column in the middle is where you will put your main course content, resources and activities. By default, this column is divided into 10 topics (or sections). Other course formats can be enabled via the Course settings page, such as Onetopic (Tabs). This changes the layout of the page but keeps all the content.
Parts of a course
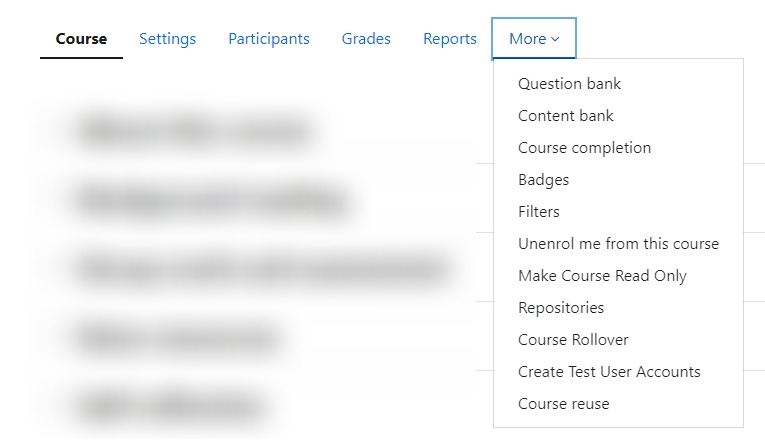
Course navigation.
These provide a quick way for the teacher to access important aspects of the course. The More link takes you to, for example, the Content and Question banks and Course reuse which incorporates Backup, Restore, Import, Reset and Copy.
The Course navigation uses menus to access the feature to configure. Refer to specific mini guides for further information on how to:
- Edit course settings.
- Enrol users.
- Establish groups.
- Manage filters.
- View reports.
- Manage the Gradebook.
- Manage Outcomes.
- Backup your course and its items.
- Restore your course and its items.
- Import items from other courses.
- Rollover the course.
- Manage question banks
- Manage repositories.
- Manage legacy course files.
- Create test user accounts.
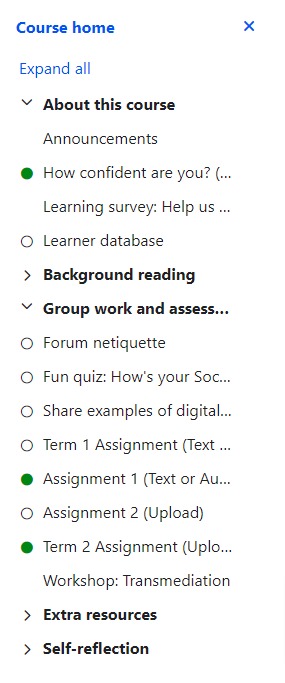
Course index.
This is a scrollable, collapsible drawer that displays course sections and elements. As you move up and down the central course area, your location is highlighted in the Course index. Clicking on an item in the Course index will open it up directly in the course central area.
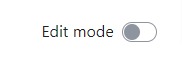
Edit mode toggle.
An easy way to toggle edit mode on and off.
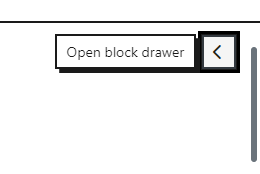
Block drawer.
This is not visible until you have enabled edit mode and added a block. The block drawer can be collapsed and expanded as a user preference.
Templates
Many departments have Moodle course templates that will determine the layout of Moodle courses. There is also a Connected Learning Baseline Module Template and a guide , that anyone can use to:
- Helps staff to meet the baseline (in fewer steps); and
- Provides a more consistent experience for both students and staff.
If you would like to use a template, please mention this in the comments when you request a new UCL Moodle course.
Templates will include a course format that determines how each section is displayed, suggested section titles (e.g. Home, Assessment, Have your Say), and blocks to aid navigation. When all courses in a department use a common template, both students and staff have a more consistent experience and find it easier to navigate information, as everything will appear in similar places across modules. If your department doesn't yet have a Moodle template, please contact the Digital Education team and they will be able to create one in collaboration with the department's e-learning champions.
Sections
Sections help to organise your content into topics. Each section contains related resources and activities such as web pages, quizzes, files, and links.
Usually, the first section (or tab) is where you will put the course title and introductory course-level information. Those using Onetopic (Tabs) format often call this tab 'Home' or 'Welcome'.
Find out how to edit the section headings and summary.
Course formats
The Course Format influences how the content sections of your Moodle course display. See Questions and Answers below.
Blocks
The right-hand collapsible column is made up of boxes called blocks. Blocks contain navigation aids and information that may made available from within course resources and activities, such as pages. Blocks include navigation menus, settings menus, calendar information, latest news, who else is online and so on. They can be added, moved and arranged very flexibly. Find out about adding and managing existing blocks.
Why is it important?
The way you structure your course will affect how easy it is for students and staff to navigate and find information and activities on your Moodle course. You should ensure you properly signpost different areas on your course homepage so students and staff understand what is available to them.
The course format you choose will determine how the sections are displayed. Showing all the information on one long page can be overwhelming for students and difficult for everyone to navigate, so most tutors and departments choose to show one section at a time, either by selecting this in the settings for any of the course formats or by using the Onetopic (Tabs) or default Topics format.
Who can use it?
Staff provide a name and description, structure the course sections, add labels, resources and activities to sections, select the course format and arrange blocks on the page. They also choose whether to enable course completion, so students can see items checked off as they complete them.
Students see the course and description when they search for a course. They see the other structures when they access the Moodle course homepage.
Before I start...
Check if your department has a Moodle course template and if they do you should use this for any new courses and align any existing courses to this template, to provide a consistent navigation experience for both students and staff. Unfortunately, there is no way to retrospectively fit a template to an existing Moodle course, so it means you will need to copy and paste content and manually move and add sections, items and blocks. Although you can also import items from the template course, assuming you have edit access to this.
Meeting the Baseline
The UCL E-Learning Baseline suggests the following for Structure :
- 1.4 Use a Faculty or Departmental template to provide a consistent layout and experience for students and staff. These provide a starting point to help staff meet this baseline, but may be modified to suit the course being delivered.
How do I...?
Change the overall course structure and information?
- The Course navigation, at the top of the page provides many options to set up your course. Note it has dropdown menus, just click on the title next to the arrow to open them.
- Click on Settings to take you to the Edit course settings page.
- You can change the Course full name and the Course short name; the latter appears in the breadcrumb navigation and has to be unique across UCL systems (the system will warn you if it isn't).
You can change the Course start date and Course end date. This determines whether the course will be listed in the In Progress, Future of Past tab in the Course overview block on your My courses page.
- You should provide a (very short) description of your course in the Course summary, so students can see what it covers if they search for it and they can distinguish it from other courses with a similar title.
- Course visibility determines whether students can see your course.
- From the drop down menu choose Show, to reveal the course to students. Students can now see and search for the course.
- Or, choose Hide, if don't want students to find or access your course. A course can be hidden from Students but not from its Course Administrators and Tutors.
- Go to the Course format section, to change the layout/format of your course. Use the Format drop down menu to choose any of five course formats. Popular options include the default Topics format, and Onetopic (Tabs) format because they allow students to see one section at a time.
- Enabling Course completion allows a tutor to choose which activities in a Moodle course must be completed by students. Completion tracking allows you to set activities and resources as completed either automatically (based on grades - e.g. receiving 80% in a quiz) or by allowing students to mark a task as 'done' when they have completed it (e.g. a reading). To do this, change the Enable completion tracking setting to Yes.
- Click Save and display.
Change the title and description of content sections?
- Switch edit mode on.
To quickly edit the title you can:
- Click the pencil icon to the immediate right of the section title. Enter a new title and click the [enter] key to save it. To cancel renaming the section, click your mouse anywhere on the page.
To edit the title and/or description via menus:
- Click the three dots to the right of the section title and/or description you'd like to edit and choose 'Edit topic'.
- Check the 'custom' Section name.
- Type in something more descriptive, but not too long - especially when using Onetopic (Tabs) course format.
- Enter a description that helps students understand the purpose for the section of the course - e.g. summarise the topic, or if it contains all the assessment, give a brief overview of the assessment process.
Add or remove sections?
From the course homepage:
- Switch edit mode on.
- You can easily show an extra section on your Moodle course by clicking the link "Add topic" at the bottom of the page, below the sections .
- If you are using the Onetopic format (Tabs) the + icon appears to the right of the last tab.
- To remove a topic, click the three dots to the right of the topic/section you'd like to delete and select "Delete topic".
- You will be prompted to confirm your wish to delete the section and its contents. Note that all activities inside the section and their user data will also be deleted. Use the Recycle bin to reverse this if you do it by mistake.
Move sections within my course?
Whole sections can be re-ordered, along with all the items inside them.
- Switch edit mode on.
- Drag and drop the section either from the course central area or the Course index to your chosen location.
- If your course page is long you can also drag from the central area to a location in the Course index, and/or you can click the three dots next to a section, select Move and choose the location to move it to.
In Onetopic (Tabs) course format:
- Switch edit mode on.
- Click on the tab you want to move.
- Click the three dots to the right of the section.
- Click 'Move right' or 'Move left' to move the section, one tab at a time.
Hide sections in my course?
Whole sections can be hidden.
- Switch edit mode on.
- Click the three dots to the right of the section title.
- Click on ‘Hide Topic’ to hide the section from a student’s view.
Get a permalink to a section on my course?
- Switch edit mode on.
- From the three dots to the right of the section name, click Permalink.
- Copy the link to use it.
Add and edit items on my course?
- To begin editing your course start by switching Edit mode on (in the top, right corner of your Moodle course).
- Once in Edit mode, you will see:
- a 'three dots' icons appearing to the right of each topic to manage these.
- an 'Add an activity or resource' link at the bottom of each topic. This is how you add content to your course.
- a supplementary 'three dots' icon to the right of every resource and activity in the central column - click on this and you will see the following editing options for that item:
- Edit settings - lets you edit the settings and in some cases the content of that item (for most resources - except books).
- Move - to move this item elsewhere in your course.
- Move right - indents the item
- Move left - if you have indented an item, this will remove the indent
Hide/Show - will hide a visible item from students / show a hidden item
Duplicate - will duplicate an item with similar settings (but not activity content like forum posts or assignment submissions - do not use for Turnitin Assignments!)
- Assign roles - allows you to elevate a student (or other role) just for this one activity or resource. E.g. you may allocate a particular student to the non-editing tutor role on a forum, so they can moderate posts (delete, edit, move etc.) This does not affect their student access to any other activity or resource on the Moodle course.
- Delete - will prompt you if you really want to delete the item and then will remove it completely from Moodle - this is not recoverable.
Display descriptions for each item on my course?
- Every resource and activity has the option for a description, which is where you should put instructions to students.
- You can also choose to display the description on the course homepage, which might be useful to describe the purpose of an item, providing you don't clutter the page with too much information.
Move items within or between sections?
This depends on the course format you are using.
On most course formats, or if you want to simply move an item within the same tab, you can either:
- Switch edit mode on.
- From the three dots to the right of the item, select Move.
- Click the item you want it to move below.
or
- Switch edit mode on.
- Click the item and drag it to the desired location on your course page.
In Onetopic (Tabs), if you want to move an item to a different tab you need to:
- Switch Edit mode on.
- From the three dots to the right of the item, select Move.
- Click the item you want it to move below.
Further help
Further guidance on Moodle structure is available from Moodle Docs. Note, that where Moodle refers to teachers, we use tutors and course administrators at UCL.
If you find any inaccurate or missing information you can even update this yourself (it's a communal wiki).
If you have a specific question about the tool please contact the Digital Education team.
Caution
- None at this time.
Examples and case studies
Read about how one department is using Moodle course templates to provide a consistent course structure for students.
Questions & Answers
Q. What is the best course format to use?
A. The default Topics format, or Onetopic (Tabs) format are good options for limiting the amount of information students and staff see at any one time. This makes the page information easier to read and is known as "chunking" content. Another option is to use Topics format and set it to 'show one section per page'. Students then use the navigation menu to navigate, but you need to ensure you enable course sections within the navigation block.
Further information
- None at this time.
Also see:
This information is provided by Digital Education
( https://www.ucl.ac.uk/isd/digital-education-team-information ) and licensed under a Creative Commons Attribution-ShareAlike 4.0 International License
