M50 - Attendance
Keywords: attendance, register list, sign in.
What is it?
The Attendance module allows course administrators and tutors to take attendance during a class, and also has the option for students to mark/view their own attendance for each of their courses.
A teacher can mark the attendance status of a student as "Present", "Absent", "Late", or "Excused". These status descriptions are configurable, and more can be added if required. The teacher adds the activity to the course and then creates the dates they would like to monitor.
For quick access, course administrators and tutors can also add the Attendance block to their Moodle course. It also provides students with a summary report of their attendance. Students' attendance can also appear as an item in the gradebook.
Why use it?
It provides a quick and easy way to take attendance, with all data being stored in one place. The Attendance module can generate reports for either the entire class or individual students. Students may also see their own attendance record if the activity is not hidden.
Who can use it?
Course administrators and tutors.
Before I start...
If you expect your students to note their own attendance, inform your cohort(s) of this prior to your sessions.
How do I set one up?
- Go to your Moodle course and switch Edit mode on.
- Within a section, click the Add an activity or resource button, then select Attendance.
- Provide a name.
- If you would like to have this activity shown in the gradebook, scroll to the Grade heading, select Scale from the grade Ty pe drop-down, then select the relevant option. If you do not want this shown in the gradebook, set the Type to None.
- Click Save and display.
Adding sessions
You can now add the specific sessions you want to track attendance.
- Still within the Attendance activity, click the Add Session button.
- Complete the fields as required. Note that there is an option for students to self-report their attendance.
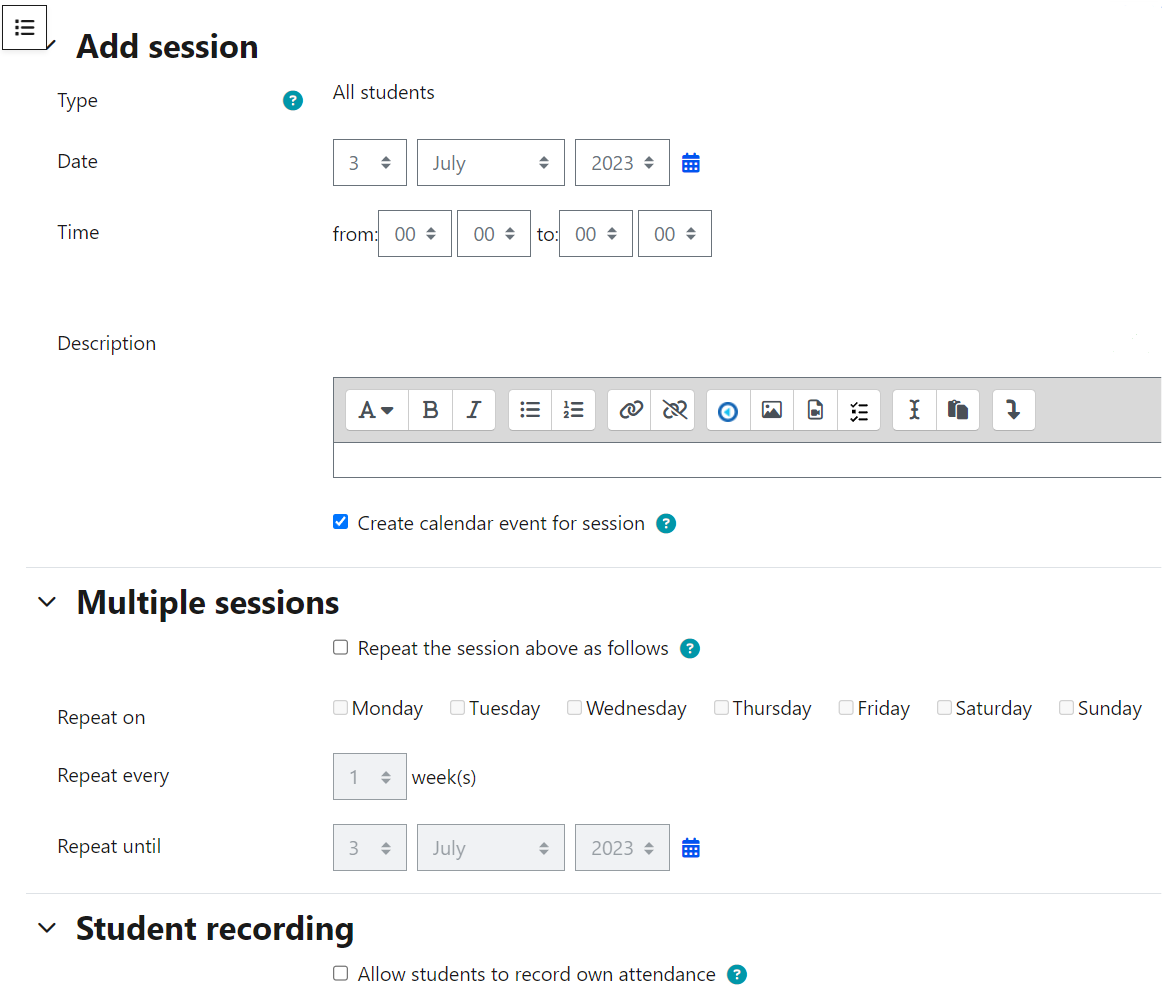
Once the session is active, you can then begin taking attendance.
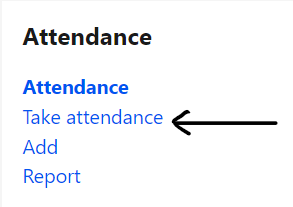
Taking attendance
You can start taking attendance either using the activity, or the block.
- Click the Attendance activity link, then click the Play icon to start taking attendance.

Or - In the Attendance block, click Take attendance.
You will then see the list of enrolled students on your course.
To the right of each student, there are four radio buttons:
- P = Present
- L = Late
- E = Excused
- A = Absent
Select the relevant choice for each student. There is also a free text box in which you can add comments for each student. Once you have completed this, click Save and show next page.
You may find it useful to export the data for any sessions that have taken place.
- Click the Attendance activity link on your Moodle course.
- Click the Export tab at the top of the page.
- Amend the fields as required and click OK to begin the download.
Further help
Further guidance on the Attendance activity is available from Moodle Docs.
If you find any inaccurate or missing information you can even update this yourself (it's a communal wiki).
If you have a specific question about the tool please contact the Digital Education team.
Caution
- Unless you want to award marks for attendance, be sure to set the Grade Type to None.
Examples and case studies
- None at this time
Questions & Answers
- None at this time
Further information
- None at this time
This information is provided by Digital Education
( https://www.ucl.ac.uk/isd/digital-education-team-information ) and licensed under a Creative Commons Attribution-ShareAlike 4.0 International License
