5. Staff Large File Submission (OneDrive)
If your students are required to submit one or more large-size files (>1gb) as part of an assessment, then you can have them submit the files directly to your OneDrive by sending a link to a OneDrive folder by email. These instructions how to create and send such a file request.
As part of this process you should think about the time period during which you will accept submissions. OneDrive will record the time of each submission and you can disable submissions when you choose. There is no way for a student to recall a file or to delete an uploaded file. Be aware that while the submission link is active, you cannot prevent a student submitting a new version of the file, but you will be able to check the history of submissions for a file.
Separate advice is provided for students [link] on how to respond to a file request
Create a folder for submissions
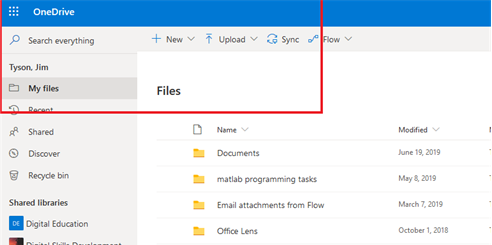
Use your browser to create a folder in OneDrive to hold the submitted files. There is no way to create file requests from the OneDrive desktop app.
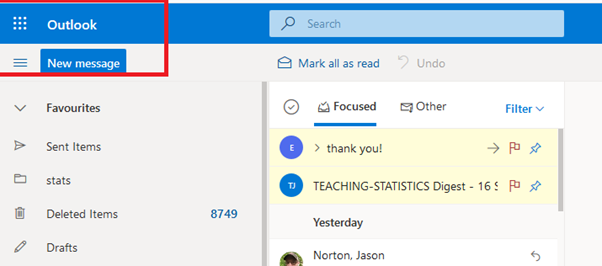
You can access your OneDrive from Microsoft Teams. Teams is available from the web-based Outlook mail app by clicking on the dot grid or ‘burger’ icon at the top of your mailbox page.
In OneDrive you can use the new link to create a new folder.
Select the destination folder, making sure that the left-hand check icon is highlighted and checked.

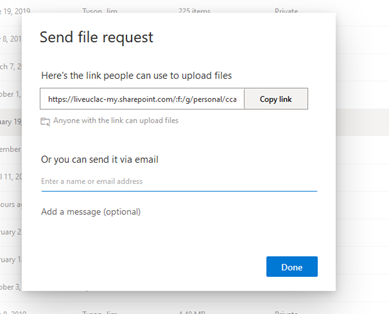
Create the file request link or email
Use the Request files link to create the request.

It is here that you should provide a short, meaningful description of the files required.

Distribute the file request link
You will be prompted to either copy a link which you can distribute to students or to send an email directly.
Separate advice is provided for students to use the link to upload their files [link].
Viewing the files
Students will be prompted for their name when they upload files. It may be convenient to ask that they add their UCL userid as their first name when they upload files for confident identification of student work. If the student is signed into Office365 when they make the submission, OneDrive will add their name automatically to the file.
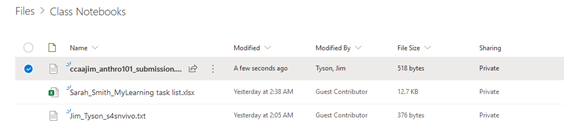
When students have uploaded files they will appear straight away in your OneDrive folder.
Deactivate the link after the submission period
In OneDrive, select the folder used for submissions and click on the three dots icon for the folder:

This will open the access management panel on the right of your screen.
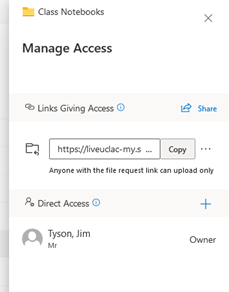
You can close the folder for submissions by clicking on the three dots icon next to the link box.
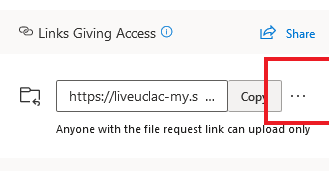
You will now see a cross next to the link
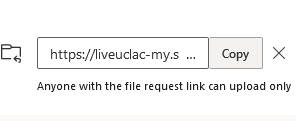
Clicking on the dross symbol will deactivate the link and close the folder for submissions.
Verify submission times
You can check the submission times for submitted files.
Select a file in your folder and right click on a file name. Now you can choose version history.
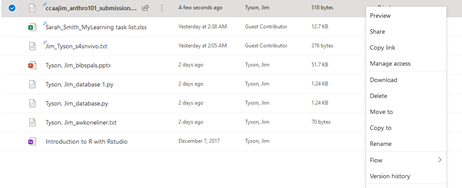
This opens the version history panel on the right of the screen.
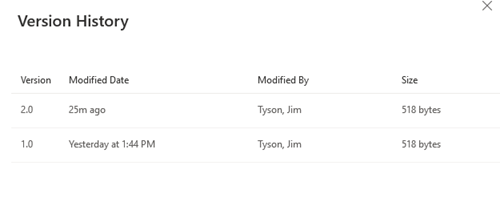
So that you determine how many versions of a file where submitted and when. You can if you wish view, delete or restore an earlier version of the file by selecting and write clicking.
Submissions in progress at the deadline
If a student’s submission is in progress when a link is deactivated their submission will fail. Any partially uploaded data will appear in the folder and the version history will show that it was submitted after the deadline.
This information is provided by Digital Education
( https://www.ucl.ac.uk/isd/digital-education-team-information ) and licensed under a Creative Commons Attribution-ShareAlike 4.0 International License
