Create a Universal Capture Personal recording
Introduction
This training guide describes the basic steps required to create a recording using Universal Capture software.
It involves:
- Video tutorial
- Open the Capture Details editor
- Select inputs for your recording within Echo360
- Finalising your capture
- You will need to download and log into the Universal Capture software before you can begin the steps below. Please visit this wiki page for further guidance on /wiki/spaces/LecturecastResourceCentre/pages/32804809.
- Always run a test capture first to be sure it will work.
1. Video tutorial
The video tutorial will show you how to create a Lecturecast capture using Universal Capture. Alternatively, you can follow the text-based step-by-step guide below.
2. Open the Capture Details editor
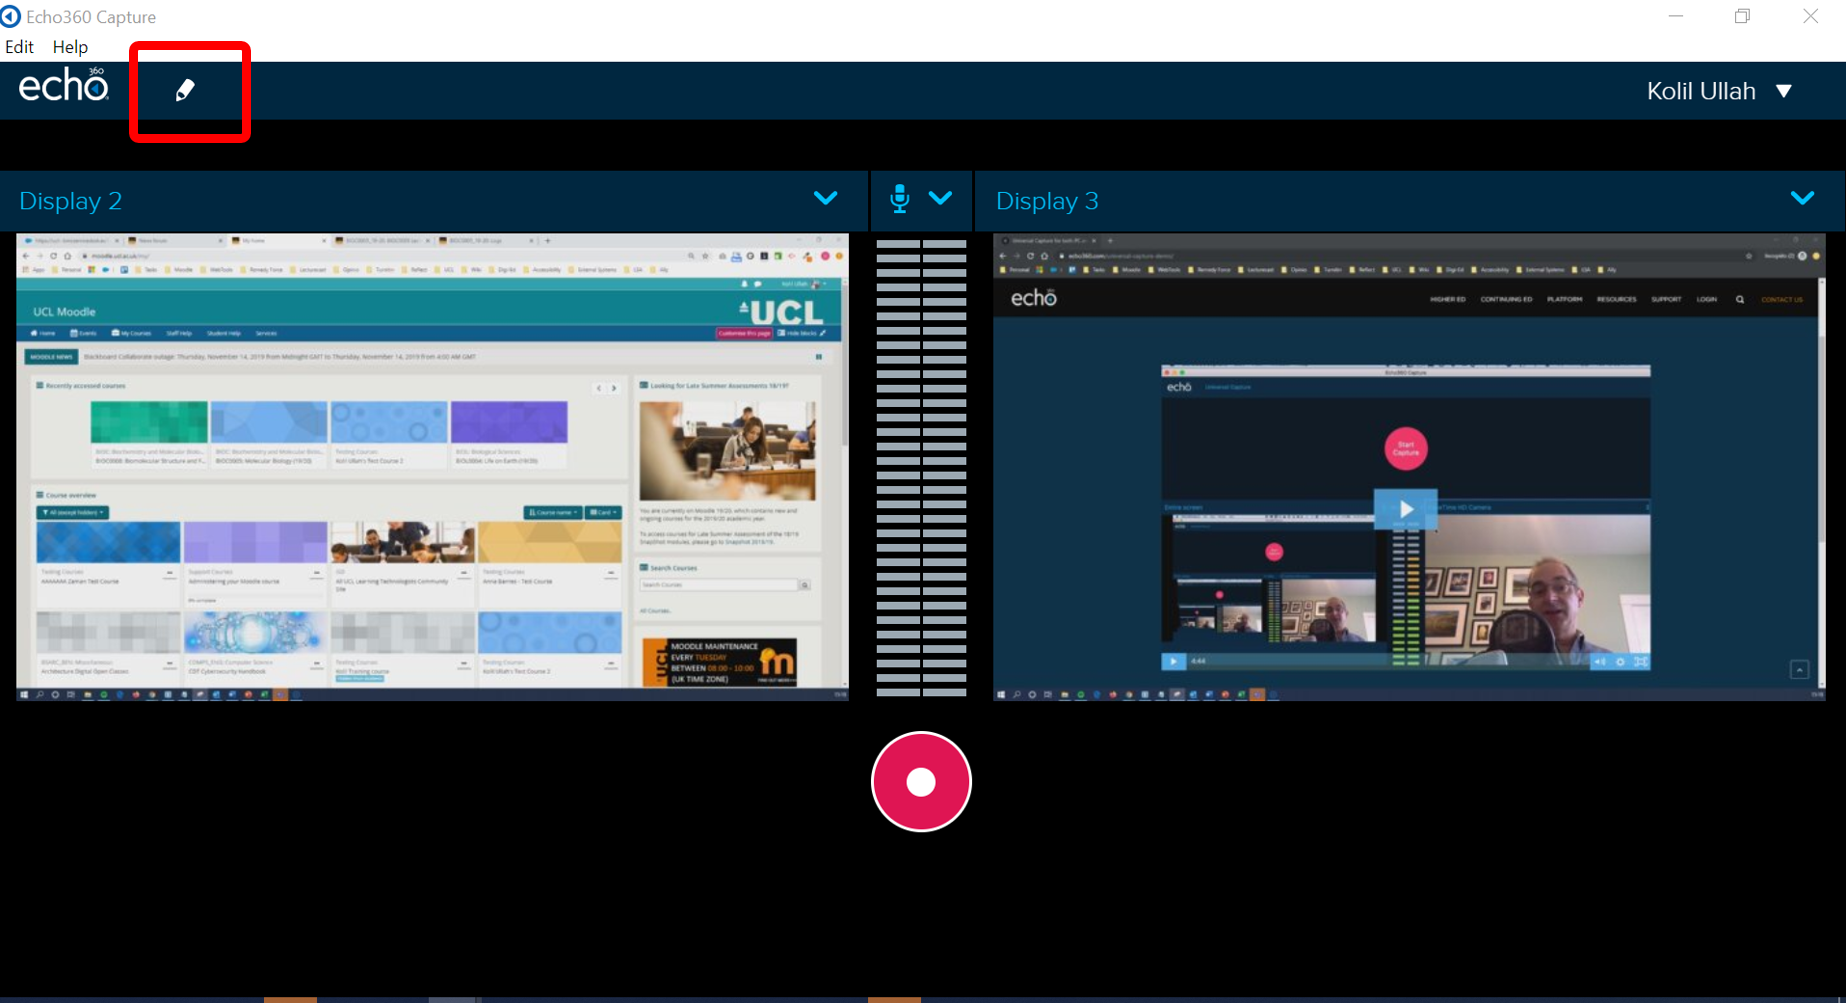

Once you have logged into Universal Capture, Click on the pencil icon to edit the 'Capture Details'. Enter a title, description and tags (keywords to aid in searching) associated with your Capture, and choose to publish to a section on a Moodle course or to your 'Library' within Echo360. In this scenario, we will publish it to the personal media library.
Click on 'Save' button to save changes.
3. Select inputs for your recording within Echo360

Use the drop-down lists at the top centre and right of the preview screen to select the inputs you want to use. You can record up to three inputs, one of which must be audio.
Click the 'Record' button to start your recording, and once your recording has started:
- Click the 'Pause' button to pause the recording during the capture.
- Click the 'Stop' button when you have finished recording. The recording appears in the list of recordings
at the bottom of the screen.
You can also control a recording via the keyboard:
| Action | Windows | Mac |
|---|---|---|
| Pause and Resume (toggle) | Control + 6 | Command + 6 |
| Finish (stop) the recording | Control + 8 | Command + 8 |
| Extend the recording | Control + 1 | Command + 1 |
When you have stopped your recording, you MUST wait until the "Uploading in Progress" has finished, BEFORE closing the
application. Long recordings may take several minutes to process.
Before you start recording:
- Enter a title for your recording in the title bar (Step 2 above).
- Set up the presentation and/or visual items you are planning to capture.
- Clear your desktop of any files/applications you are not going to show during your recording to achieve a smooth
and uncluttered presentation of materials.
4. Finalising your capture
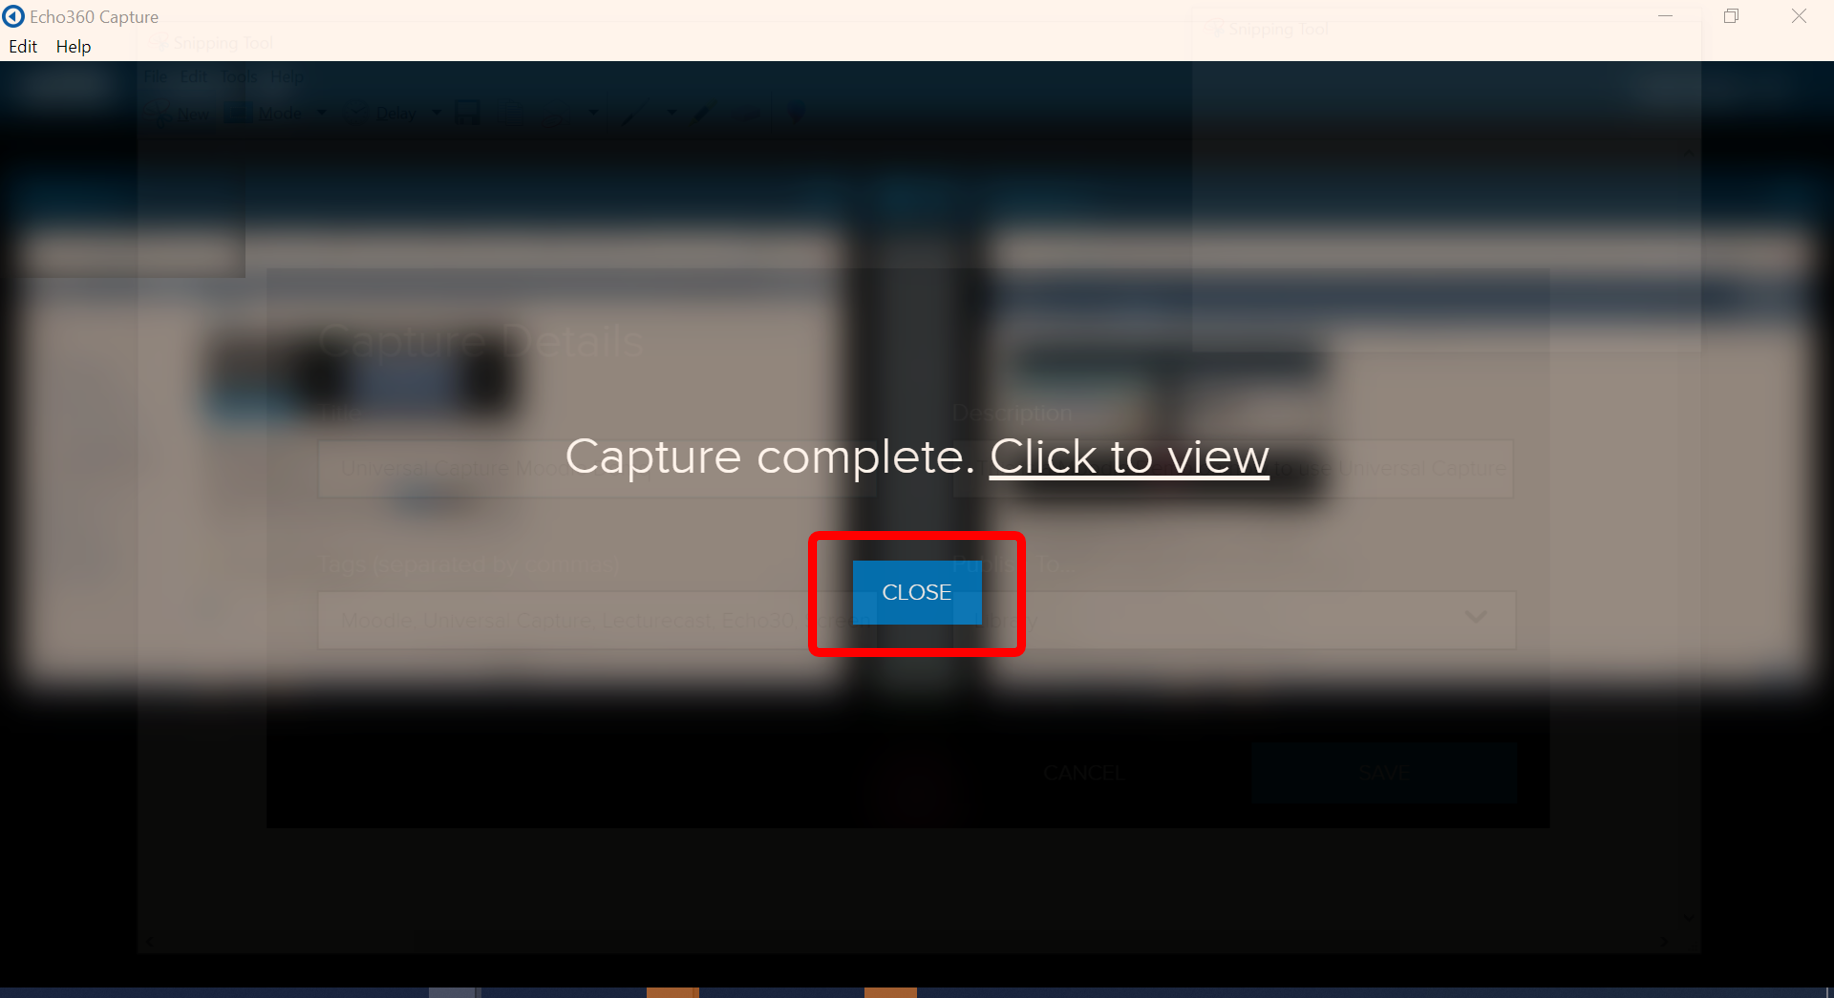
Once your capture has been processed, click on the close button to return to the Universal Capture application.
Your capture will be available in your personal media library and you can choose to do the following:
- To Edit a Universal Capture recording, please visit the Lecturecast Guides on how to 'Edit and make a capture available'.
- To share your Universal Capture recording, please refer to the Lecturecast training guide 'Sharing Lecturecast Captures from your Media Library'.
For detailed instructions, see Echo360 online guidance - Start a recording with Universal Capture Personal