Zoom Recordings in Lecturecast
Introduction
From Friday 4th August 2023 your Zoom recordings will not be ingested automatically into your Lecturecast/Echo360 library unless you choose to opt-in. However, if you choose to opt-in, all your Zoom recordings will be automatically saved in Lecturecast.
Note:
This is recommended only if the majority of your Zoom recordings are teaching-related, such as lectures or tutorials, as it allows for future reference and easy sharing with your students.
1. How to Opt-In
Step 1: Log in to Echo360
Step 2: To opt-in, click on the 'cog' icon that is located towards the top right of the screen and click on the ‘Account Settings’ option.
Step 2: Once the 'Account Settings' screen opens, click on the ‘Zoom Settings’ link from the left-hand menu.
Step 3: Make sure that the ‘Automatically copy Zoom recordings to Echo360’ option is toggled to the ON position, as per screenshot below:

2. Find your Zoom recording
Step 1: Open your Moodle course and open the Lecturecast link on that course. If a Lecturecast link hasn't been created on your Moodle course, then you will need to create a new link.
Step 2: Navigate to your personal library within Lecturecast by clicking the  icon located in the top left of the page.
Step 3: Once you've clicked on the EchoVideo logo, you'll then see your personal library within Lecturecast that will contain your Zoom recordings.
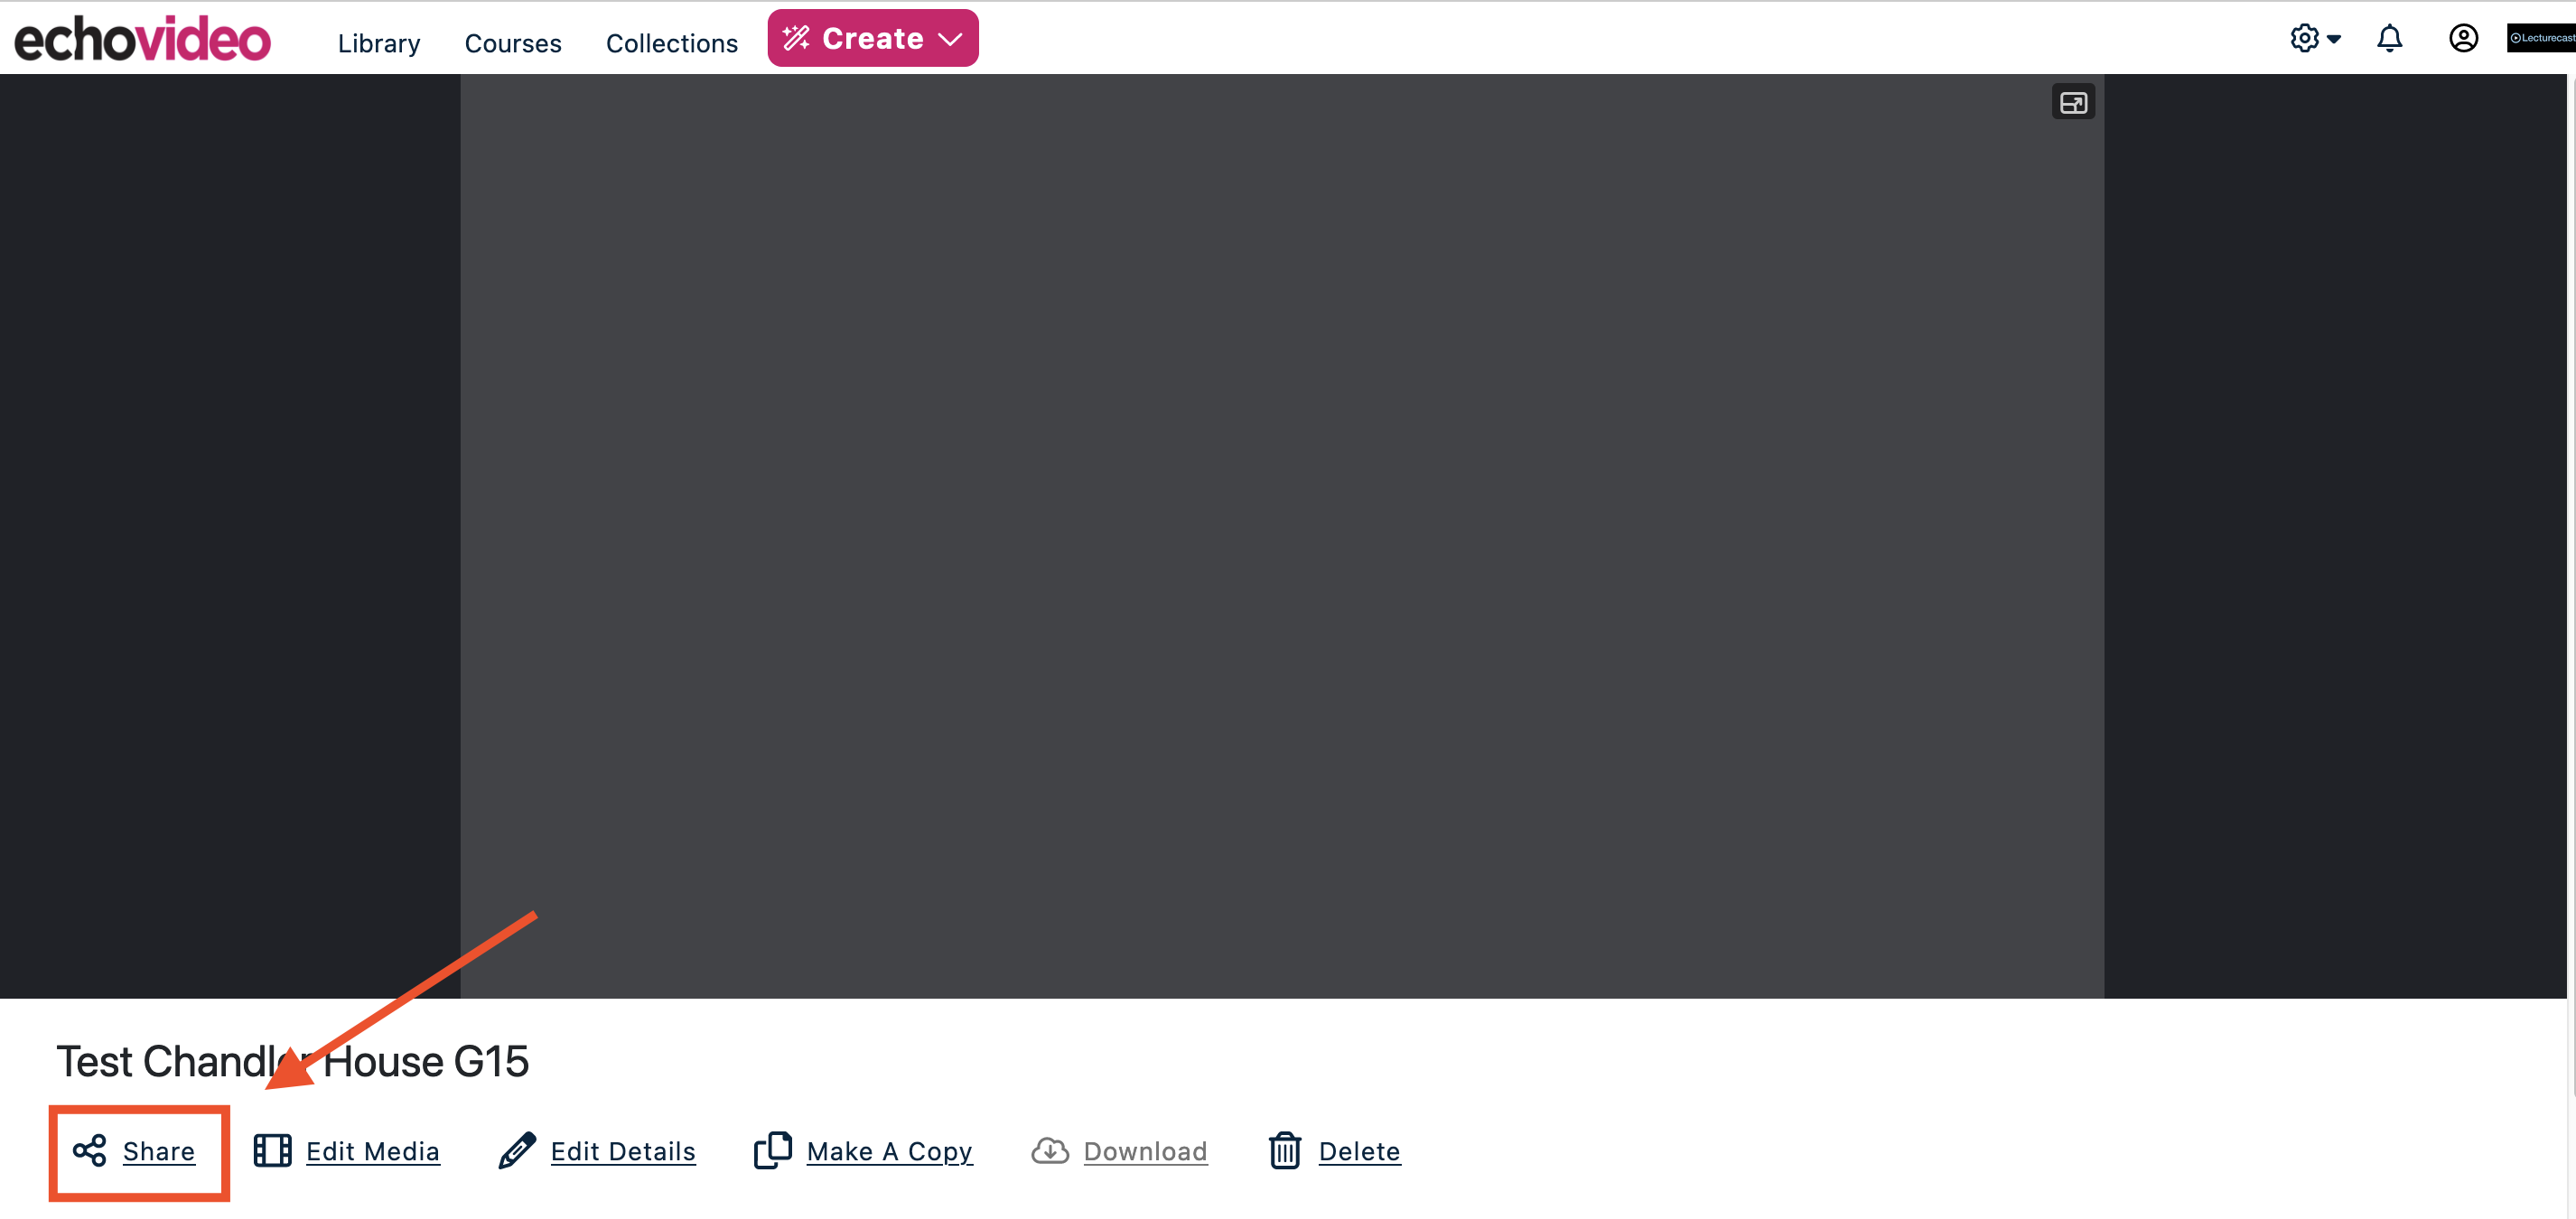
Step 4: Find the recording you wish to publish, click on it and then press Share on the page that loaded. Please see the image below:
Note:
For more information on scheduling Zoom meetings, please refer to this guide in the Moodle resource centre: M60 - Zoom Meeting.
3. Publish Your Recording
After clicking on the "share" option, the share settings window will open up. To publish the Zoom recording, go to the Class tab. It's essential to note that you must add a New Class to prevent overwriting any existing content in your course.
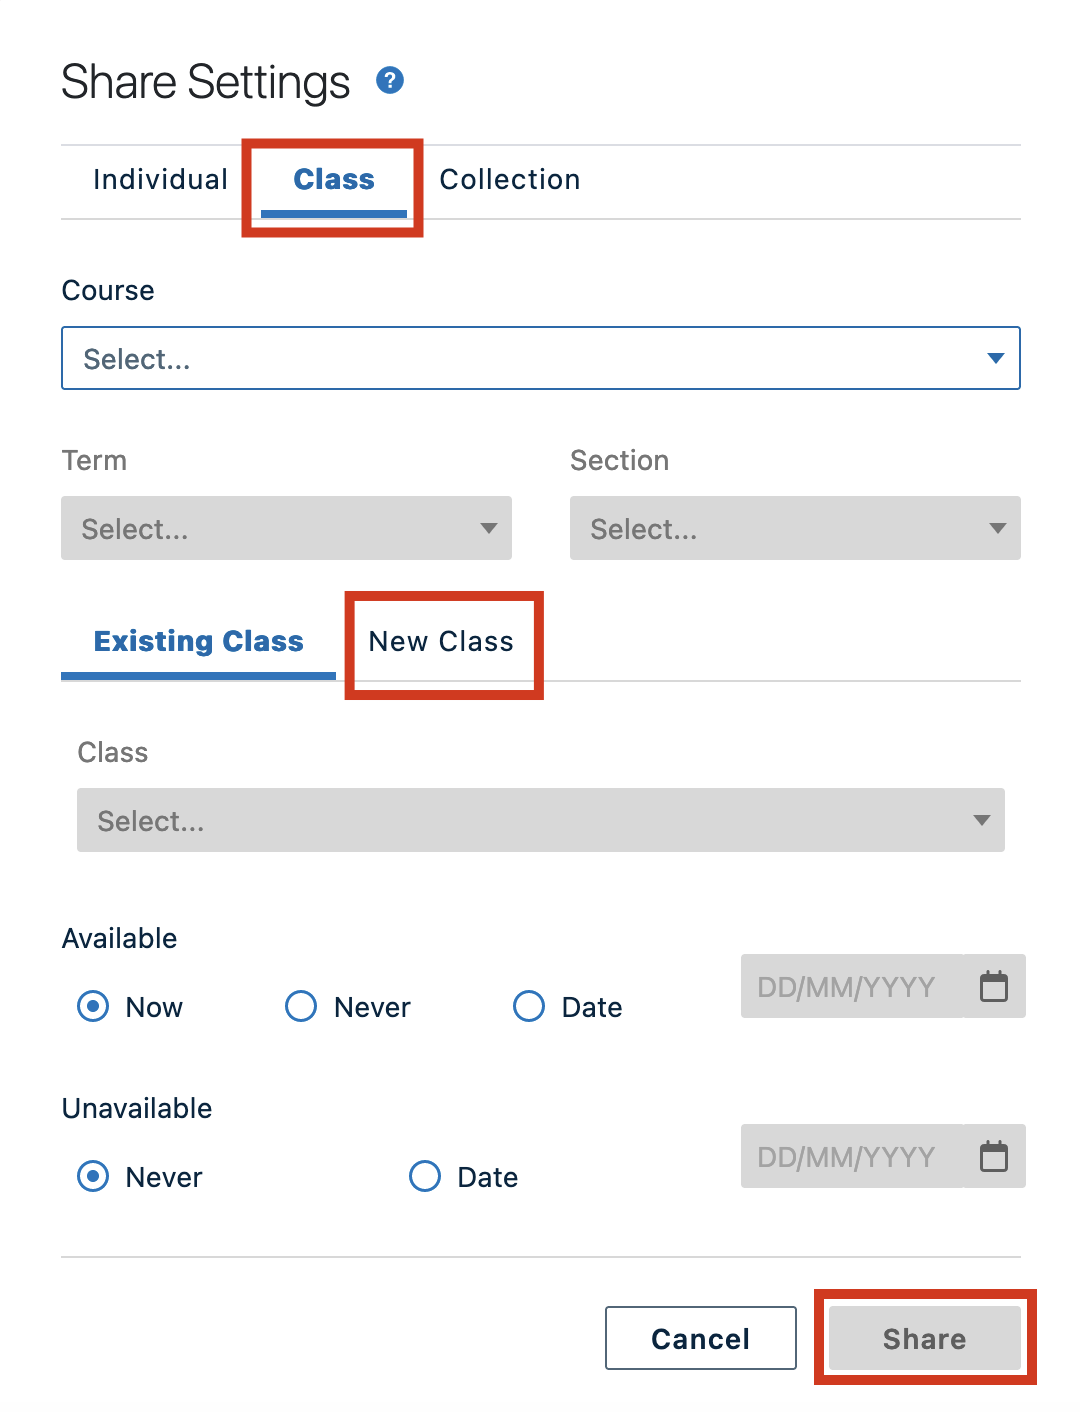
Please follow the instruction below to publish your recording:
Step 1: Select Class.
Step 2: Use the Course dropdown to search for the course you wish to publish into. You can start typing your course name for your course to appear.
Step 3: Select your Term.
Step 4: Select your Section.
Step 5: You must add a New Class to avoid overwriting any existing content.
Step 6: Enter a Class Name.
Step 7: Enter the Date, Time and Duration of when this recording was taken.
Step 8: Press Share in the bottom right corner to publish the Zoom recording to your course.
4. Uploading Zoom Recordings to Lecturecast
Step 1: Sign into Zoom directly using the single sign on system via ucl.zoom.us.
Step 2: Once you have signed into Zoom, locate your recording by opening the Recordings section.
Step 3: Download your recording.
Note:
- Please note that Zoom generates a transcript for recordings which can be uploaded into Lecturecast to use instead of the captions and transcript generated by the automatic speech recognition function.
- Please note, you will need to manually download and upload the Audio Transcript VTT file if you wish to use Zoom's captions instead of those generated by Lecturecast. For more information on uploading transcripts, please refer to the Echo360 guidance.
5. Add your Zoom Video to a Class
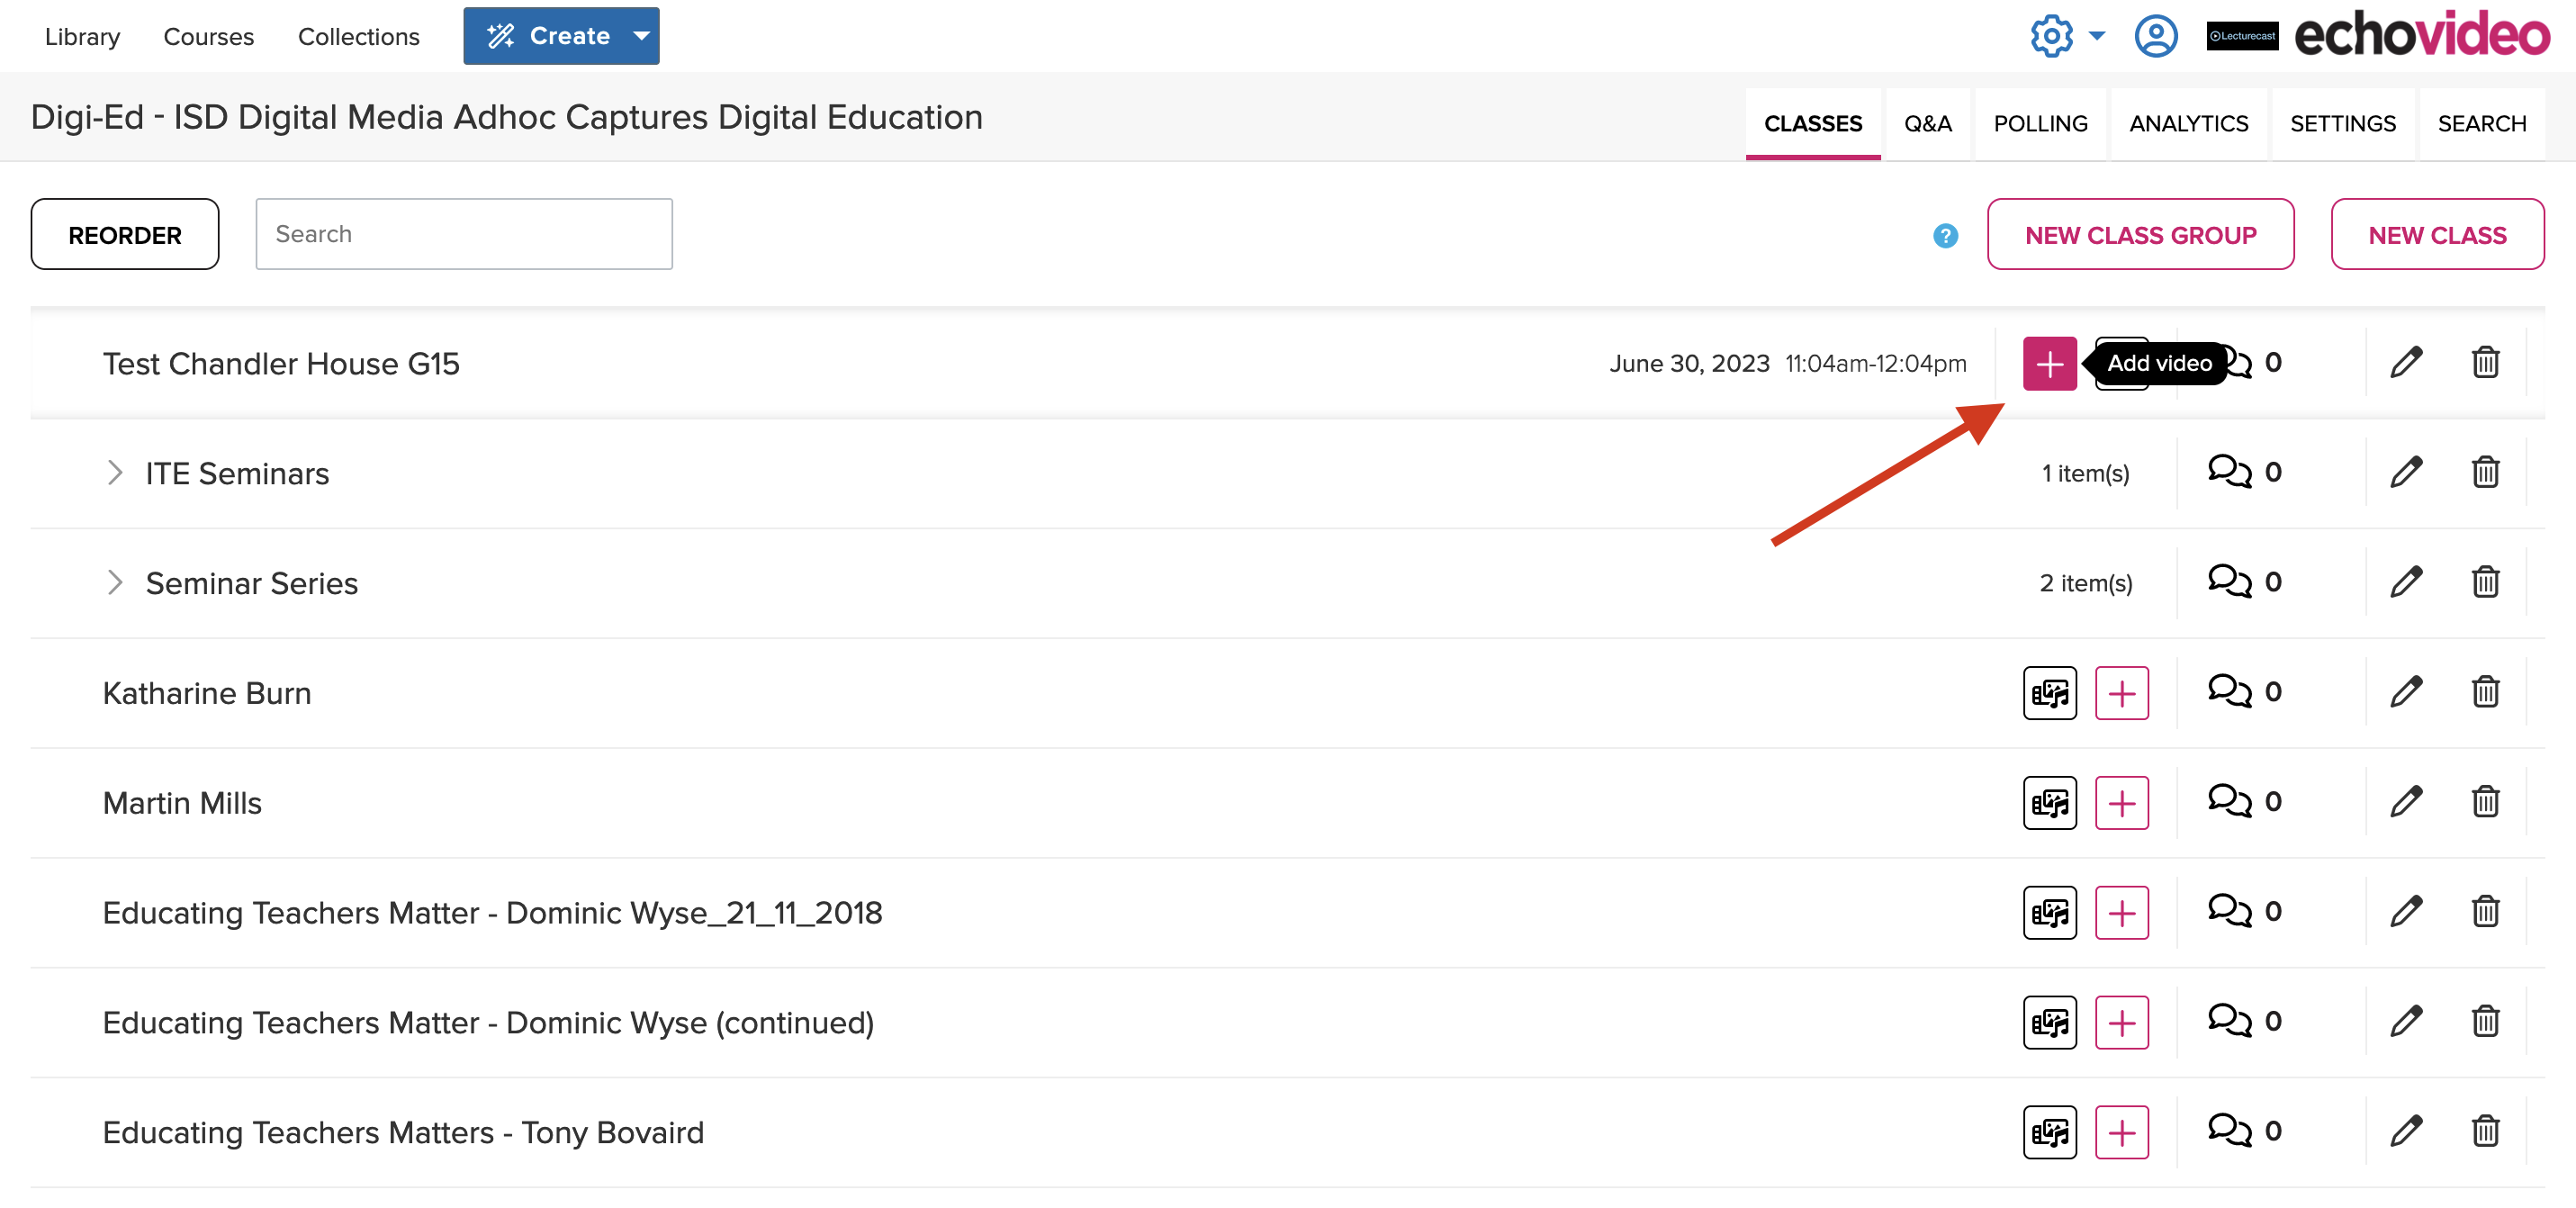
In cases where the class includes a presentation but lacks a video (and does not have a grey placeholder for a scheduled recording), you can add video media to the class by clicking on the 'Plus' icon in the video slot. This allows you to choose from your content library or upload a file from your local computer or shared drive.
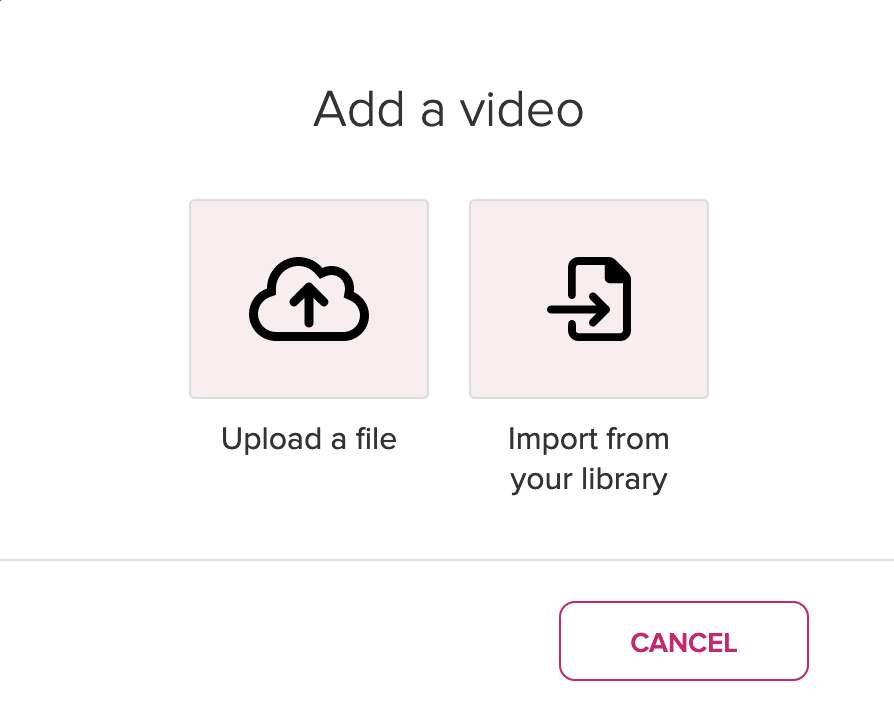
Select 'Upload a file' or 'Import from your library' to complete this action. If you select 'Upload a file' a window appears allowing you to navigate to your content, select and upload it. If you select 'Import from your library', your library content list appears allowing you to select the item to publish to the class.
Note:
- Should you have any issues with Zoom access or recordings, please email zoomsupport@ucl.ac.uk.
- If you're unable to share your Lecturecast recording, please ensure you are enrolled onto that course in Moodle as a tutor or course administration before opening the Lecturecast link. Should the issue still occur after doing accessing Lecturecast via Moodle, please email digi-ed@ucl.ac.uk.
- Please refer to the 'Edit and make a capture available' mini guide for more information on how to edit Zoom meeting recordings in Lecturecast.